What Is Plumbing?

Westfield Plumbing is a system of pipes and fixtures that bring water into buildings and carry waste water out. Plumbers install, repair, and maintain these systems.

Plumbing

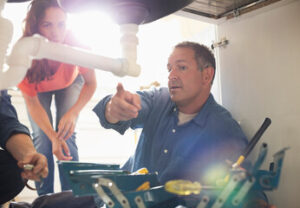
A plumber’s work is physically demanding and requires a strong work ethic. They often work evenings and weekends. They may also be on-call for emergency situations.

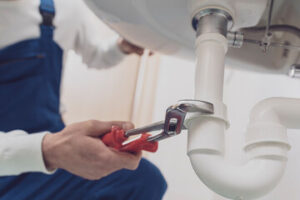
Drain pipes are a key part of your home’s plumbing system. They transport wastewater and solid waste away from sinks, tubs, and showers to the sewer or septic tank. There are several different types of drain pipes, each designed to handle specific waste and water types. Understanding how they differ and how to distinguish them is crucial for proper installation and maintenance.

One of the most common types of drain pipe is a PVC (polyvinyl chloride) line. This type of pipe is easy to clean and is resistant to corrosion. PVC is also highly affordable and durable, making it a popular choice for residential use. However, PVC does have some drawbacks. While it is environmentally friendly, it cannot withstand high temperatures and is not as durable as other piping materials.

Another type of drain pipe is a metal drainpipe, which is typically made from stainless steel or galvanized steel. These pipes are able to withstand higher temperatures and are more durable than plastic pipes. Metal drainpipes are also less susceptible to rusting than other piping materials. However, metal drainpipes are usually more expensive than other types of piping.

There are also a variety of specialty drainpipes, such as floor drains and French drains. These pipes are used to facilitate the drainage of standing water in yards and other outdoor spaces. They are typically installed in a trench and filled with gravel or other porous material. The gravel serves to help prevent erosion and sand from washing into the trench.

Lastly, there are sanitary sewer lines, which are the largest drain pipes in your home. These pipes are used to transport sewage and waste from toilets, showers, and sinks to the septic tank or municipal sewer system. In order for these pipes to work properly, they must be in good condition.

While a drain pipe and a sewer pipe both serve the same purpose, they are very different in terms of size and how they are used. Taking the time to understand the differences between these two pipes can ensure that your plumbing is working correctly and safely. It can also help you make an informed decision about a potential plumbing project at home.
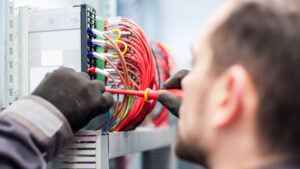
Vent Pipes

The plumbing system is designed to remove water and waste efficiently. It relies on both the drainage and vent pipes to do its job well. Drainage pipes carry wastewater out of your home to the city sewer or septic tank. Vent pipes ensure that fresh air gets into the drainage pipes to prevent a vacuum that can cause slow or no drainage. Understanding how these two systems work together can help you diagnose and resolve common plumbing issues.

What Is a Plumbing Vent Pipe?

A plumbing vent pipe is a pipe that runs from your drain line to the roof of your house. They also serve to ventilate the air in your plumbing system, helping it to function properly. Plumbing vents can be made of a variety of materials and come in different shapes and sizes. There are several different types of ventilation options available, including true vent pipes, ductile iron pipe, galvanized steel and PVC. The best option for your home depends on the size and layout of your house, local building codes and other factors.

Generally, every fixture has a trap seal (also called a “p-trap”) that is filled with water. This seal keeps sewer gas from entering your home through a drain. However, the pressure of your plumbing system can fluctuate over time, and if that pressure is great enough, the trap can lose its water seal. If that happens, the p-trap becomes nothing more than an empty piece of plastic and allows sewer gas to enter your home. A plumbing vent introduces air into your drainage system, breaking the siphon and preventing the loss of the crucial trap seal.

Another reason for venting is that it lets in fresh air, which helps prevent condensation in your pipes. This can lead to mold, mildew and other nasty growths that can affect your health. Venting also prevents the buildup of ice in your pipes, which can lead to blocked or frozen drains.

Unfortunately, a lot of things can go wrong with your vents. Because they are exposed to the elements, they can become clogged with leaves, branches, snow, rodents and other debris. Blocked vents create negative pressure in your plumbing system, which causes the drains to glug or stop working completely. Some of the most common signs of a blocked vent include gurgling sounds coming from your drains or sewage odors in your home.

Fixtures

In the context of home and commercial plumbing, fixtures are the receptacles that receive and discharge water and water-carried waste. Some of the most common types of plumbing fixtures include sinks, bathtubs and showers, toilets, and drain stoppers. These devices serve a variety of purposes, including providing water for drinking, washing, and bathing. They also provide a means of disposing of human waste and wastewater, which is then collected by sewage systems or sewers.

Unlike pipes, which are buried in the walls and floors of a building, fixtures are usually mounted on the walls or on stands for easy accessibility for repair and maintenance. They are available in a wide variety of shapes, sizes, and styles to meet individual preferences and needs. They can be adorned with a variety of finishes, and they come in different colors and materials to suit the design of the space.

Fixtures are also used in manufacturing, where they help maintain accuracy and ensure consistent production. They help reduce setup times, increase efficiency, and improve the quality of finished products. They are commonly used in the machining industry, but they can be found in other industries that require drilling, grinding, cutting, and assembly.

While jigs and fixtures can be costly to design, they can lead to significant cost savings for manufacturers in the long run. They can also save time by eliminating the need for manual adjustments to machine parts during production, which can result in errors and rework. By securely positioning components, they also minimize mistakes and accidents, making them a crucial component of any manufacturing process.

With the advent of computerized machining and automation, fixture design has become increasingly sophisticated. Using software solutions like fixturemate, designers can quickly and easily create custom fixtures for specific workpieces and manufacturing processes. This digital transformation has made it possible to streamline the design process and make fixture-making more accessible, even for those who are new to CAD. This has paved the way for dramatic reductions in manufacturing costs and increased productivity, particularly in industries like automotive and aerospace.

Water Heaters

A water heater is a large metal cylinder that holds hot water at the desired temperature. It is usually located in a garage, basement or laundry room and uses either gas or electricity to heat the water. Electricity-powered water heaters use a heating element to create the hot water, while gas-powered water heaters have a flame underneath the tank that warms the water. Water heaters can also be powered by solar, wind or geothermal energy.

A cold water inlet on the bottom of a tank feeds cold water into the inside base, where it’s heated by a burner or heating element. As the water heats up, it rises to the top of the tank where it exits through a hot water outlet tube. Water temperatures are controlled by a thermostat, which is adjustable. The recommended water temperature setting is between 120 and 140 degrees Fahrenheit. Higher temperatures create a higher risk of scalding.

In some homes, electric point-of-use water heaters with low power heating elements are installed in sink cabinets and used for hand washing only. These units do not have a bulky storage tank and are more energy efficient. They are also a good choice for retrofitting existing buildings where a high-capacity tank is too expensive or impractical to install.

During normal operation, electrical current runs through a 220-volt circuit and past two heating elements inside the tank that are powered by a thermostat. The thermostat keeps the heating elements turned on until it senses that the water temperature has fallen below the setpoint. When this happens, the thermostat shuts off the heating elements to prevent overheating.

Most tanks have a temperature and pressure relief valve on the side or at the top and a drain valve on the bottom. The valves are not normally used, but they serve as a safety precaution in case the tank is damaged or has a leak. They also allow you to drain the tank occasionally for maintenance and to remove sediment from the bottom of the tank.

Mold Remediation – What You Need to Know

Mold Remediation Provo is an important step in restoring your property after water damage. This process involves cleaning, disinfecting and sanitizing affected areas, and repairing damaged items.

Mold Remediation

First, professionals will erect containment to isolate the mold from unaffected areas of your home. They will also use negative air machines to clean spores from the air. Porous materials contaminated with mold need to be removed, including carpets and drywall.

If a home or office is infested with molds, a licensed mold assessor can work to contain the growth and prevent further contamination. Containment is accomplished by setting up barriers that separate the affected area from the rest of the building. Depending on the size of the infestation, there are several different levels of containment. Full containment is used when an entire building has been contaminated, while limited containment is recommended for smaller areas involving between 10 and 100 square feet of mold contamination.

During the process of remediation, it is important that all porous materials that have been wet for 48 hours or more are removed and safely stored. These include carpeting and carpet padding, wallpaper, some furniture, drywall, insulation material and non-washable fabrics. The items that are not able to be saved are either stripped and completely removed or sanded down, wire-blasted or soda blasted. The spores that are disturbed and become airborne during the remediation process must also be removed. This is done with negative air machines that run continuously throughout the project, using high efficiency particulate (HEPA) air filters.

The first step of containment is to HEPA vacuum every surface within the area of the mold contaminate. This includes the inside and outside of all doors that are opened to the contaminated room. The HEPA vacuums are a special type that prevents the microscopic spores from being redistributed into the air once they have been sucked up. The second step of containment is to use dehumidifiers or other climate control systems to lower the humidity level in the area of the contaminated room. High humidity can encourage further mold growth, even after the mold has been removed.

After all surfaces and non-porous items have been cleaned, a biocide is sprayed on the remaining moldy surfaces. The biocide makes the mold spores sterile so they cannot grow and spread. Then, any non-porous items that have been remediated are returned to the rooms where they were originally located. This is a necessary step to ensure that the mold spores do not spread once the items have been cleaned and sanitized.

Removal

Removing mold during remediation consists of several steps. First, any non-porous materials affected by the mold should be cleaned and wiped down with a solution of water and bleach. These wipes should be wrapped in 6 mil polyethylene bags and double-bagged for trash disposal. Porous items like carpet, drywall and fabric should be removed rather than simply cleaning them. These items should be disposed of according to local regulations.

Before starting the removal process, put on some personal protective equipment such as a mask and goggles that don’t have ventilation holes. This will help prevent mold spores from entering your eyes or respiratory system and causing further problems.

Once you’re in the containment zone, start by identifying the type of mold growth. Allergen-based molds are usually easy to identify by their musty odors, while toxic species such as Stachybotrys chartarum, or black mold, are often identified by their dark green to black color and slimy texture.

When the type of mold is known, begin removing the colony. A mask or respirator is recommended for this step to prevent spores from spreading during the removal process. It’s also a good idea to wear rubber gloves to prevent burns from harsh cleaners. Then, take a rag with your cleaning mixture and give the area a light scrub. Be sure to scrub tight corners and indents as well.

Next, allow the area to air dry. This will take three to five days. After the area is dry, it should be rechecked by sight and smell to make sure all of the mold has been removed. Ideally, the contaminated areas should be sealed with pigmented shellac or oil-based primer. These products will prevent future mold growth and can be found at your local hardware store.

If the mold infestation is extensive, it may be necessary to remove and replace drywall, insulation and carpeting. This is especially true if the mold has caused wood rot or if the moldy drywall has been cut during the course of a plumbing leak. Depending on the severity of the mold, you may also need to replace ductwork and HVAC components.

Cleaning

Molds grow in locations where organic material co-mingles with moisture. To stop growth and limit the spread of mold, it’s important to clean and sanitize all affected areas. The cleaning methods used during mold remediation depend on the type of surface and extent of contamination.

Surface molds such as those found in bathrooms, sink cabinets and window sills due to condensation are easily removed with a mixture of bleach and water. This cleaning solution works by killing the mold and removing its spores. It’s also important to protect yourself while cleaning by wearing a mask and gloves. If you’re not comfortable with the fumes of bleach, a mild detergent can be added to the mix. Then simply scrub the area and rinse it off with clean water.

Porous surfaces such as carpeting, drywall and fabric-covered furniture may need to be thrown away instead of cleaned. It’s also important to address the factors that led to the mold growth in the first place. This can include addressing humidity levels and repairing any leaks.

If the mold is on outdoor surfaces, the first step is to remove all debris and plants that block access to the area. This will help prevent the mold from being spread to other areas of the home while you’re working on it. Once the debris is removed, it’s a good idea to cover the surrounding areas with a 6 mil polyethylene sheeting. This will separate the work area from other unaffected or occupied spaces and provide a double barrier for exhausting air scrubbers during the mold abatement process.

Next, if the contamination is extensive, a containment plan must be put in place. This will involve using a polyethylene covering to isolate the work area and creating an exhaust system for the air scrubbers. It’s also a good idea to use a dehumidifier in the area during this time. If there is a lot of condensation, a dehumidifier can help by reducing the amount of water that collects in the area and prevents it from growing mold. Once the containment and sanitization processes are complete, it’s important to conduct a post-cleaning inspection to ensure that the mold stains have been fully eliminated.

Disposal

Molds are a type of organism that can grow on many materials and can cause a variety of damages to those materials. Molds also spread from one area to another through the air. This means that they can affect people and animals in other areas of the house or building. This is why it is important to take care of the problem as quickly as possible. It is best to contact a professional when dealing with this problem. They will be able to determine the level of damage and how much of it can be salvaged.

During the remediation process, building materials that are affected by mold will be removed from the affected area. This includes drywall, carpeting, insulation, and more. The affected items will then be disposed of according to EPA standards. Once the affected materials have been removed, the space will then be sanitized and dried. This will help to make sure that all of the mold spores are killed and cannot start growing again.

It is essential to dry the spaces that have been cleaned and sanitized to prevent new mold growth. This can be done by using fans, dehumidifiers, and other methods to speed up the process. Once the space is completely dry, it can then be replaced and restored.

In order to ensure that the mold spores do not spread to other areas of the home during the remediation process, a containment barrier is put in place. This barrier is made of plastic, polyethylene sheeting and helps to seal the area and prevents airborne spores from spreading to other areas of the home. It is important to wear masks and gloves during this step as well to minimize exposure.

During the cleaning and sanitization steps, it is often necessary to use biocide/fungicide/moldicide solutions. These chemicals are used to kill the molds and help them to break down. These chemicals are also used to remove any residue that might be left behind on the surfaces. This step is essential to ensuring that all of the molds are killed and removed from the home.

Tree Pruning

Pruning removes dead or unhealthy branches, reduces the risk of damage from heavy winds, and helps your trees look their best. Tree Pruning also promotes fruit production and improves the health of your trees and landscape.

Tree Pruning

Size management cuts shorten a tree’s height or width, typically to avoid interference with utility lines or to create clearance for buildings and vehicles.

Tree branches are the primary means through which trees manufacture (photosynthesis) and transport nutrients to other parts of the plant. They also form the skeletal structure of a tree and provide visual interest. Good pruning involves the removal of dead, diseased or structurally weak limbs while keeping branches evenly spaced throughout the canopy. Proper branch spacing promotes air movement, helps to prevent sun and wind damage and reduces the likelihood of limb failure during storms.

Branches that grow too close together can interfere with each other’s growth or crowd out desirable branches. They can also be a source of insect problems, such as sapsuckers that eat holes in the bark and wood or hummingbirds that hover near the ground seeking nectar. To maintain an attractive appearance, remove drooping or overhanging branches to create more open spaces in the canopy.

When trimming a branch, be sure to make your cuts correctly. A bad cut can lead to rot, insect infestation and other serious problems. Using a pair of hand shears or loppers, first saw an undercut about an inch away from where the branch intersects with the trunk. This will remove the majority of the weight of the branch while minimizing the size of the cutting wound.

Then, locate the “branch bark ridge” or branch collar — a slightly swollen area of tissue at the base of the branch where it joins the main stem. A proper pruning cut begins at the ridge, angles down and out away from the trunk and leaves a stub just outside of the collar. A flush cut (or a cut that is made all the way to the crotch) injures this tissue, making it more susceptible to fungi and other decay organisms.

Never seal pruning wounds with tree paint as this will only impede the natural process of compartmentalization that trees use to protect their internal tissues. In addition, pruning wounds on live wood are more likely to become a site for the spread of disease, such as oak wilt and other fungal mats, when they are exposed to sunlight.

Trunk

A tree’s trunk is its primary support structure. Branches grow from the trunk and extend upward into its canopy. Thinning a tree involves removing specific live branches to reduce the overall density of a canopy, allowing more sunlight through and improving air circulation. It also reduces stress on selected limbs from gravity, wind or snow.

Branches that are diseased, dead or damaged should be removed immediately. Pruning is more effective if it follows a definite plan, determining why you want to remove the branches and how much material you can safely take off in any one year. Hard pruning can encourage lots of vigorous upright shoot growth, called water sprouts, which are undesirable.

For thinning cuts, start by sawing an undercut through the base of the branch about 12 inches out from where you will be cutting. Then, saw a cut downward through the limb an inch or more farther out from the first undercut to prevent tearing the bark. This process allows the limb to break off between the two cuts, instead of falling away as a stub. It also ensures that the final cut is outside of the branch collar, which helps prevent water damage and slows decay.

Make all other pruning cuts using the three-cut pruning process, which will help prevent tearing the bark. Whenever you cut a branch larger than 1 1/2 inches in diameter, saw an undercut about an inch out from the branch collar (an area of stem tissue where a branch meets the trunk or an older branch). Then saw through the limb an inch or more further out than the first undercut until it breaks off. This will leave a clean, stub-free cut that won’t tear the bark. Always avoid removing the branch collar, which is important for wound closure and to protect against trunk disease.

Do not coat pruning cuts with tree wound dressing or paint. Studies have shown that these coatings don’t prevent or speed up wound closure and may actually slow down the natural healing process. They can also shelter disease organisms and encourage fungi that promote rot.

Canopy

The canopy of a tree is the top layer of branches and leaves that covers its stems. Canopy pruning aims to thin this dense layer and allows more sunlight to filter through below. This process helps promote plant health and prevents damage to other plants and property. It can also reduce the chance of limbs falling in high winds or during snowstorms.

It’s important to prune your trees regularly in order to keep them healthy and safe. You can remove dead or diseased branches, and eliminate branches that are obstructing sunlight or touching each other. This will help your landscape thrive by allowing it to get more light and air.

In addition, you can raise the canopy by removing lower branches that are growing too low and putting your property at risk of damage from storms or ice buildup. This will help keep your trees at the ideal height and provide a more manicured look.

When thinning or raising the canopy, be sure to use proper pruning techniques and follow the ANSI A300 pruning standards. The best time to perform these tasks is during dormancy, when the tree has a chance to heal before the next growing season begins.

Make all pruning cuts using reduction cuts only, and never heading cuts, which can weaken the tree and create problems later on. Also, be careful not to over-prune your canopy, which can leave the tree vulnerable to disease or insect infestation. If possible, only take off about 20% of your canopy during a single pruning season to avoid over-pruning.

Pruning Tools

Having the right pruning tools is essential for making clean, precise cuts to promote healthy plant growth and shape plants. Start by investing in quality cutting tools that will last for years and hold their edge after many uses and sharpenings. A well-made pruning tool will often have replacement parts and may even offer a lifetime warranty.

Hand pruners, also known as secateurs, are a common garden tool for pruning small branches and twigs. They have short handles and scissor-action blades, designed to make clean and precise cuts on shrubs, flowers, and vines. They come in three basic types: bypass, anvil, and ratchet pruners. Bypass pruners, which cut like scissors, are good all-rounders. Anvil pruners, which cut on a flat surface, can crush as well as cut, so are better suited to woody stems. For larger stems, a pruning saw is the best tool to use. Pruning saws usually have a fine-bladed saw for cutting green wood, and coarse-bladed saws for cutting dead wood. Some pruning saws are telescopic, allowing them to reach high branches without the need for a ladder.

A gardener should also consider using a loppers for trimming shrubs and hedges, or even a power hedgetrimmer for more extensive work and higher productivity. Some loppers have a shear-action blade that can be used for both fine and coarse cuts. These are good all-rounders, although they cannot cut as thick a branch as pruning shears. For heavy-duty trimming work, a telescopic pole saw can be used, which can be extended up to 3 m.

Safety is always a concern when working with tools. A pair of sturdy, close-toed gardening gloves can protect hands from thorns and other debris. A hard hat, eye protection, and hearing protection are also recommended when working with a chainsaw or other motorised equipment.

Finally, don’t forget to sanitize your pruning tools between each use. This reduces the chances of spreading disease from one plant to another. A rag soaked in rubbing alcohol can do the trick, or you can purchase a sanitizing solution from a home improvement store. It is also best to prune during the dormant season, as this will reduce the chance of spreading disease organisms.

What Does a Realtor Do?

Savannah Realtors are real estate agents who are members of the National Association of Realtors (NAR). They have completed the NAR’s pre-licensing requirements and passed their state’s real estate exam.

Realtor

Realtors work on commission; they earn about 6% of the selling price of a property. The commission money covers their salaries and business expenses.

Professionalism is a key ingredient to any successful real estate business. It is the standard that every Realtor must abide by when they interact with their clients and customers, other Realtors, and members of the public.

Realtors must practice professionalism through honesty, integrity, and good communication. This is especially important in dealing with consumers, who rely on their Realtor to provide them with information that is honest and accurate. They must always respect the confidentiality of a client’s financial information and not disclose confidential information to unauthorized individuals or parties. They must also adhere to the Code of Ethics and Standards of Practice of the National Association of REALTORS(r).

One of the most important aspects of a Realtor’s job is to help their clients understand the home-selling or buying process. This includes explaining how the market works and giving them an idea of what to expect during a transaction. It also means letting them know about the process of appraisals, inspections, and lenders. Professionals are generous with facts and stingy with opinions. They also let other professionals, such as the appraiser and inspector, do their jobs without interference or disparagement.

Real estate professionals must treat all clients fairly and equally. They must not discriminate on the basis of race, color, religion, sex, familial status, handicap, or national origin. They must also make sure that all contract details are clear and spelled out in writing, and they must keep entrusted funds separate in an escrow account.

Even Realtors who are committed to high ethical standards occasionally have honest business disputes with other agents or their customers. These disputes can be resolved through arbitration or mediation, which are private and confidential processes that offer an alternative to the traditional real estate industry dispute resolution procedures that are determined by state real estate licensing authorities and the courts.

Education

Assisting clients in buying, selling, and renting homes and commercial properties, realtors must possess excellent interpersonal communication skills as well as attention to detail. They work with clients as well as with other real estate professionals, such as mortgage lenders and inspectors, to ensure the transaction is completed smoothly and on time. To obtain a license to practice as a realtor, aspiring agents must complete pre-licensing training programs and pass the state’s licensing exam. To keep abreast of new laws and trends in the industry, they must continue education through various workshops, seminars, and online courses.

Some colleges offer associate’s and bachelor’s degrees in real estate, while others have certificate programs. Online schools also offer specialized courses for aspiring agents. These programs provide a solid foundation in the industry and cover topics like market analysis, property management, and real estate law.

In addition to education, a successful realtor must be able to understand and communicate neighborhood nuances. They must be aware of factors that affect the quality of life, such as crime rates, school systems, and accessibility to public transportation and grocery stores. They should also be familiar with local government regulations, such as zoning laws and taxation.

A degree in psychology or communications can be helpful for Realtors, as they must be able to empathize with their clients and understand their needs. Marketing coursework is also beneficial, as it provides insights into sales strategies and digital marketing. Other electives, such as business administration, can help a realtor understand the financial side of the industry and how to run their own brokerage firm. A minor in urban planning can be a great complement to a real estate degree as it offers insights into city planning and development, which allows Realtors to advise their clients on long-term investment opportunities.

Experience

A Realtor’s job is challenging. It involves long hours and dealing with high-stress situations, not to mention the challenge of competing against internet real estate services like Redfin, Zillow, and Trulia. It’s also important to have strong skills in marketing, social media, record keeping, and financial planning. A good Realtor is also well-connected and has a network of local vendors to help with mortgage lenders, title companies, home inspectors, appraisers, general contractors, and other essential resources.

A successful Realtor is familiar with the market and able to identify a seller’s motivation. This enables them to offer competitive pricing and negotiate the best deal for their clients. They also know what neighborhoods are trending upward or downward and have a pulse on the community. In addition, they have connections at City Hall and in the local industry. For example, if a top employer in the area is expanding or laying people off, they often know about it before it’s even published in the news.

The ideal Realtor has experience in both commercial and residential properties. They should be able to communicate clearly and confidently with buyers, sellers, and other real estate professionals. They should be able to use a variety of tools to market their listings, including social media and video tours. They should also be able to attend real estate training sessions and take continuing education courses. They should have excellent interpersonal skills and be able to meet deadlines. They should also have a strong work ethic and be able to handle stress. A successful Realtor will have a strong track record of closed transactions and a solid network of local referrals. They will be able to negotiate the best price for their client’s properties and understand the intricacies of the transaction process.

Licensing

As with other professions, real estate agents must be licensed in their state before they can work. Depending on where you live, the process may require several hundred hours of pre-licensing courses and passing a state licensing exam. Once you’ve passed your test, you can apply to become a member of NAR and access its Multiple Listing Service (MLS).

NAR members are required to abide by the Code of Ethics, which is a set of standards that reflects a commitment to professionalism in the real estate business. This includes putting your clients’ interests first, truthful advertising, and protecting client information. It also prohibits discrimination based on race, religion, sex, familial status, and national origin.

Realtors must disclose any personal interest they have in a property and must keep their own funds separate from those of their clients. They must also present transaction documents to buyers and sellers in clear, understandable terms. Realtors must also cooperate with each other, but not at the cost of their client’s interests.

In addition to a code of ethics, Realtors must pay membership dues and adhere to state and local regulations for real estate practice. They must also join a local real estate board or association that’s affiliated with NAR. This requirement gives them a professional community where they can engage with fellow members and develop their skills.

If you think a Realtor has violated the Code of Ethics, you can file an ethics complaint with their local board or association. The association will investigate the claim and determine if it merits any disciplinary action. If a Realtor violates the Code of Ethics, they’re subject to a fine and potential suspension or expulsion from NAR.

Ethics

In any industry, it’s important for professionals to act ethically. This means that they treat their clients with honesty and fairness, and prioritize their client’s interests in every transaction. This is especially true in real estate, where a Realtor’s success depends on trust. If you’re looking for a Realtor who will work hard to meet your needs and exceed your expectations, you’ll want to find one who takes their ethics seriously.

The National Association of Realtors (NAR) created a code of ethics that all members must adhere to. These guidelines cover a wide range of issues, including how to deal with the public and other real estate agents. For example, NAR requires its members to put their clients’ interests first and disclose any problems with a property. They also must be truthful in advertising. The NAR’s Code of Ethics is designed to protect consumers and promote the best interests of the industry as a whole.

NAR also has a process for addressing complaints against its members. This includes a grievance committee and an arbitration committee. The committees review the standards of practice and determine whether there was a violation. If the agent is found to have violated the Code of Ethics, they may be required to pay a fine or undergo additional training.

It’s important to note that the term “REALTOR(r)” is a registered trademark and only members of NAR can use it. However, all real estate agents must follow the real estate Code of Ethics to ensure they are acting in their clients’ best interests. By following the code, Realtors can build trust with their clients and help maintain a strong real estate market.

Electrician Job Description: Skills, Tasks, and Tools

Installs and repairs electrical wiring and systems in homes, buildings, and industrial facilities. Tests electrical systems using tools like ohmmeters and voltmeters.

Electrician

Some electricians work independently, and some choose to join a company that can offer benefits and support in their career advancement. Either way, successful electricians need to be able to communicate effectively with customers and other employees. Contact Electrician Nashville TN for professional help.

Professionalism is the act of behaving and conducting oneself in a way that shows respect for others and follows accepted practices. Electricians who follow the principles of professionalism are often able to provide quality service that results in satisfied customers. This in turn leads to repeat business and referrals. Additionally, electricians who practice professionalism are more likely to adhere to industry regulations and best practices, ensuring the safety of themselves and their clients.

Many Electricians work as independent contractors or in small electrical contracting firms. These roles require the development of business acumen in addition to technical skills. As a result, it is important for Electricians to frequently update their goals and professional development plans, ensuring they are aligned with company objectives. This is especially true when working on larger projects or those involving complex systems that require specialized expertise.

Aspiring Electricians may want to pursue an apprenticeship program in order to learn the trade through on-the-job experience and earn a wage while they do so. These programs can either be union or non-union and usually involve going to trade school to receive a certificate before starting an apprenticeship. Once completed, aspiring Electricians have the option to join a union such as the International Brotherhood of Electrical Workers (IBEW). Whether they are an independent contractor or part of a labor union, many electricians also pursue specialized certification in order to gain a competitive advantage and advance their careers.

The responsibilities of an electrician can vary significantly depending on the industries they serve and the type of equipment they work with. For example, commercial electricians may focus on installing lighting, power outlets and cable trays while industrial electricians may install and repair large machinery. However, the core responsibilities of each type of electrician remain the same: maintaining and repairing electrical equipment to ensure it is functioning properly.

The career of an electrician is highly flexible, with opportunities for specialization in residential, commercial, and renewable energy sectors. Specialization in these fields can lead to higher earning potential as well as greater job satisfaction.

Customer Service

Electricians work directly with customers, providing them with installations, repairs and other services. They must be able to communicate clearly with their clients and provide high-quality customer service. This includes explaining the steps of the process and answering any questions that the client may have. It is also important for electricians to be able to listen to their customers’ concerns and offer solutions that address them.

An excellent way to improve the customer experience is by asking for feedback after each service. This shows the customer that you value their opinion and are committed to delivering high-quality results. In addition, it is a great way to increase your business’s reputation and attract new clients.

When searching for an electrician, it is important to choose a qualified professional who has a good track record. A quick online search can help you find a list of local providers and read reviews from previous customers. You can also ask friends, family members and coworkers for recommendations. Once you have a few candidates, it is a good idea to schedule appointments with them so that you can compare their prices and services.

Residential Electricians are skilled in navigating the unique challenges of residential wiring. They are able to repair and replace faulty wiring, upgrade outdated electrical panels, install lighting fixtures and smart home technology, and perform a variety of other tasks to keep homes safe and energy efficient.

Commercial Electricians are skilled in repairing and installing lighting fixtures, appliances, equipment and more for businesses, offices, warehouses and other commercial properties. They can also work on low-voltage systems such as voice-data-video (VDV) wiring, which is utilized for security and other purposes.

Service Electricians are skilled in resolving electrical issues in residential and commercial settings. They can install or repair a wide variety of electrical equipment and wiring, including circuit breakers, motors, lighting fixtures, generators, and power supplies. Service electricians can also assist with plumbing issues and other general repairs.

In the field of electricity, electricians are divided into two primary categories: linepersons, who work on electric utility company distribution systems at higher voltages, and wiremen, who work with the lower-voltage systems used inside buildings. Some electricians specialize in one or the other, while others focus on a combination of specialties.

Knowledge of Electrical Systems

A thorough understanding of electrical circuits, wiring and equipment is essential for any Electrician. This allows them to troubleshoot issues quickly and accurately, ensuring that all work is completed safely and efficiently. It also enhances their ability to work with different types of machinery and systems, such as HVAC or plumbing, which often require a deeper level of technical expertise than electricity alone.

Electrical technicians must be able to read and interpret blueprints and electrical diagrams in order to install, maintain or repair electrical wiring and equipment. This skill set helps them to assess job specifications and determine the appropriate tools and materials needed for each project. It also allows them to better understand the layout of an existing system and determine if any changes are required.

Reading blueprints is a key component of any electrician’s toolkit, as it helps them to plan their work effectively and ensures that all connections are properly made. In addition, knowing where the wires are located can help them to avoid hitting live ones or damaging existing structures by mistake. This knowledge is also important when it comes to completing repairs or renovations, as it saves time by allowing them to work more efficiently and minimizes the risk of accidents.

Having the right physical attributes is also critical for any electrician, as they must be strong enough to lift and move heavy equipment. They also need to have excellent vision, as they often need to decipher the color of the wiring and its specific markings in order to connect it correctly to a device or power source.

An understanding of basic physics is also an asset for electricians, as it provides them with a foundation for the principles they use to analyze and solve problems. This includes understanding Ohm’s Law, currents, electrical resistance, Faraday’s Law and circuitry. This knowledge can help them to identify potential issues, such as overloaded circuits or improperly grounded outlets.

Electricians need to be familiar with the different electrical components found in residential, commercial and industrial settings. This knowledge is crucial for designing, installing and repairing the various appliances, lighting fixtures, machinery, and control systems that make up an entire electrical system. It is also important for ensuring that all electrical work is done in compliance with regulations and codes.

Communication Skills

As a professional, electricians communicate with customers to understand their electrical needs and work to provide solutions that will best meet those needs. They also need to be able to read and interpret technical diagrams, blueprints, and schematics in order to properly install or repair equipment.

Electricians often need to interact with customers and employees from a variety of different fields, including construction and manufacturing. They need to be able to explain complex issues in simple terms so that everyone can understand them, and they need to be able to collaborate with other team members to complete tasks.

In addition to communication skills, electricians need to have strong math and analytical thinking capabilities in order to understand complicated electrical systems and troubleshoot problems. They also need to have good physical strength, as they may need to lift heavy equipment or climb ladders. Because their jobs require them to work with electricity, it is important that electricians follow strict safety protocols at all times to prevent accidents or injuries.

There are many different types of electricians, each with their own specialties and areas of expertise. Some specialize in residential or commercial wiring, while others focus on power generation and telecommunications. They can also choose to work on new construction or maintenance projects. Some also choose to work on renewable energy systems.

Those who specialize in residential wiring are known as residential electricians. They are responsible for installing wiring, outlets, and switches in homes and other residential buildings. They also handle electrical repairs and ensure compliance with local and national safety codes.

Electricians who specialize in commercial wiring are known as commercial electricians. They are responsible for the installation of wiring, electrical panels, and lighting in commercial buildings. They also perform maintenance on existing electrical systems and are trained to manage high-voltage power lines.

Electricians who focus on power generation and telecommunications are known as line electricians. They are responsible for the transmission and distribution of electricity. They also work with renewable energy systems and other power-related technologies. Line electricians typically work outdoors and are exposed to extreme weather conditions.

Safety Tips For Tree Cutting

Tree Cutting Irvine CA is a dangerous task that requires the right equipment and precautions to avoid injury. Inexperienced tree cutters can damage property and injure themselves during the process.

The first step is to examine the area around the tree to ensure it can be felled without interfering with anything. Then, start by making an undercut and a backcut.

Tree cutting is dangerous, even though many risks can be mitigated through proper preparation. However, some safety hazards can only be partially avoided, and even careful planning can be undone through carelessness or insufficient safety gear.

A hazard assessment should be performed prior to starting any work. This should include visual inspection of the entire structure, including the roots, trunk and limbs. It should also cover weather conditions, as rain and wind can make the tree fall differently than expected.

After the notch cut is made, the worker should move to one of two escape routes immediately. These should be at least 45 degrees away from the direction of the fall, and they should be free of tripping or hiding hazards. These should be marked off by the QTW and communicated to all employees through verbal or visual means.

The QTW should also establish a method of communication between employees in the tree and those on the ground, such as a two-way radio or hand signals. This will allow the tree workers to alert the ground crew when a problem arises, such as a tree limb falling and threatening the rigging or a back cut that needs to be completed.

The QTW should also identify a drop zone and an anchor point in the tree. This information will help in determining the right tools to use and how to best approach the felling. This is especially important if the tree is being felled by hand. If the anchor point is too close to the notch cut, it can interfere with the direction of the fall, making it more difficult and potentially unsafe.

Clear the Area

When trees are removed from a property, it is important that the surrounding area be clear. This can help to protect people and structures that may be in the path of the falling tree as well as preventing foundational damage to future homes or buildings. Land clearing can also be useful in preparing for construction projects and making room for new plants to grow on the site.

Depending on the project at hand, it may be necessary to clear other types of trees from the area as well. Some professionals specialize in clearing entire forests for commercial or residential development purposes. This type of land clearing service is usually referred to as tree felling and involves the removal of larger trees, trimming of major branches, and cutting of roots.

Before the team begins, they need to clear the work area around the tree. This means removing any undergrowth, weeds, or other plants that are in the vicinity. It’s also a good idea to move any items that might be in the way, such as lawn chairs or garden equipment. This will make the job more efficient and safer for everyone involved.

Once the area is clear, workers need to determine where the tree will fall. They should choose a spot that is at least double the height of the tree. This will give them the best chance of avoiding any injuries or damage to property. It’s a good idea to also set up warning signs in the area and make sure that there is a clear path of retreat if things don’t go according to plan.

For more information about tree felling and land clearing, contact a professional tree service. They have the expertise and experience needed to ensure that these projects are completed safely and efficiently.

Make the Notch Cut

Taking down large trees involves a lot of chainsaw work. It can also be dangerous if you don’t know what you’re doing. If you don’t properly fell a tree, it could fall into a house or car, injure someone or cause property damage. The best way to avoid this is to make a notch cut to guide the tree in a safe direction when it falls.

There are different types of notch cuts to choose from when felling a tree, and the right one depends on a number of factors. Some of these include the size of the tree, its lean, and whether there are any obstructions in its path. It’s also important to evaluate the wind, as it can significantly influence how a tree falls.

A conventional notch, sometimes called a traditional cut, is the most popular option for felling a tree. This notch is typically cut with a 45 degree opening, which dates back to the days when loggers used a cross cut saw and axe to fell trees. The reason for this was that the axes cut best at this angle, and it was thought that a similar notch shape would be effective when using a modern chainsaw.

Another common notch is the undercut, which is more useful for removing hung or snagged trees. With this technique, you make a downward cut into the tree with your chainsaw and then create an upward cut on the other side. This notch is ideal for freeing hung or snagged trees because it releases all of the holding wood before the tree begins to fall, ensuring that it doesn’t break prematurely. It’s also easier to use for large, difficult-to-reach trees.

Make the Felled Cut

If the tree is a hazard and must be felled, it’s important to work in an area that will not interfere with anyone walking or working near it. It’s also essential to be aware of the direction a tree is leaning. A large tree can create a hazard if it falls into other trees, structures or land. It’s best to select a tree from a distance and walk up to it to ascertain which way it is leaning before making any cuts. This will help you avoid rotted or dead tops and other potential hazards, and ensure that you have enough space to work when felling the tree.

When it comes time to fell the tree, you’ll need to make a directional notch and a back cut. The directional notch must be positioned and angled correctly to ensure that the tree will fall as desired. The back cut should be sawn about one-third of the way into the tree, parallel and even with the apex of the directional notch.

Once you’ve completed the directional notch and back cut, saw down to a hinge thickness just above the apex of the directional notch on the side of the tree toward which you want it to fall. A conventional face cut or a newer style of undercut can be used; both are safe, efficient and well-suited to most tree felling applications.

As soon as the directional notch is sawn through and the wedges are inserted, the tree should begin to fall. If the tree fails to fall as planned, it’s best to turn off your saw, put the chain brake on and leave the area along one of the escape routes you’ve cleared.

Make the Final Cut

When pruning a tree, it is important to use proper techniques. For example, you should avoid making flush cuts, which are pruning cuts that cut too close to the trunk or main branch. This can destroy the natural defense mechanisms of the tree and leave open wounds that are susceptible to infection and disease. Instead, you should make your pruning cut beyond the branch collar and branch bark ridge. This preserves the tree’s defense mechanisms and promotes compartmentalization.

When you are cutting a large or hazardous tree, it is usually necessary to fall the tree in several sections. This is especially true if the tree is near property structures or it is too tall to cut all at once. It is also often safer for the person performing the cutting and anyone else nearby.

To do this, first you will need to prepare the area. Clear out brush, branches and smaller logs to give yourself ample space to work. Also, clear an escape route so that you can safely move away from the tree when it begins to fall.

Then, you will need to make the final cut. The best place to make this is on the side of the tree that you are felling, at a 45-degree angle downward and just above the base of the notch. This will allow the tree to fall in the desired direction and prevent it from rubbing against property structures or people.

Once you have made this cut, it is important to follow the safety instructions that come with your chainsaw. Be sure to check the wind before beginning and keep the saw in a safe position that isn’t threatening property or people.

What Are Invisalign Clear Retainers?

Invisalign is a modern treatment option that uses clear retainers to correct crooked teeth, gaps, and overbites. It is a great alternative to traditional braces, which can be difficult to clean and leave your mouth with a lot of metal.

The aligners are made from clear SmartTrack material, so they can be discreet. Invisalign is also more comfortable than traditional braces. Contact Boca Dental and Braces now!

Traditional braces have wires and metal brackets that can irritate the inside of your mouth. Invisalign retainers are made of smooth plastic and fit in your mouth like a mouthguard, so they don’t have any sharp edges. They’re also more comfortable to wear than traditional braces since you won’t have to worry about nicks and cuts on the inside of your cheeks. Plus, you can take them out when you’re eating or playing sports, so they won’t interfere with your activities.

Invisalign is also easier to keep clean than traditional braces. Because they can be removed easily, you’ll be able to brush and floss your teeth regularly without having to maneuver around a metal appliance. This will help you avoid issues like gum disease and tooth decay while you straighten your teeth.

Another benefit of invisalign is that it’s more discreet than braces. Because they’re clear, you won’t have to worry about other people noticing them. Invisalign is a great option for adults who want to straighten their smiles but aren’t ready to commit to a more permanent treatment plan.

However, it’s important to note that invisalign isn’t suitable for everyone. It can be less effective for patients with more complex dental problems, and it requires a high level of patient compliance to achieve the best results. Additionally, invisalign isn’t recommended for anyone with teeth that have already been restored or if you have gum disease.

Despite these drawbacks, invisalign is still an excellent choice for most patients. It can be used to correct a variety of dental issues, including crooked teeth, overcrowding, and misaligned jaws. It’s also an effective option for people who have previously undergone orthodontic treatment and have bridgework or crowns in their mouths. Invisalign can be a more convenient alternative to traditional braces for many patients, but it’s important to discuss your options with a dentist before you decide on a treatment plan. You’ll need to visit your dentist often for adjustments and tightening, so it’s important to choose a treatment that fits into your schedule. You’ll get the best results if you stick with your treatment plan and wear your aligners for at least 20 to 22 hours each day.

It’s more discreet

Invisalign is a popular option for teeth straightening because it is less conspicuous than traditional braces. The clear plastic aligners are virtually invisible when worn, which is appealing to many patients, especially adults who want to maintain their professional image while undergoing treatment. The aligners are also removable, so patients can eat and drink what they like without having to worry about foods that could get lodged in traditional braces.

The treatment also has fewer complications than traditional braces. Invisalign uses a digital imaging program to map the patient’s teeth and create a series of trays. The trays are made of polyurethane resin and have SmartForce attachments that help to exert a gentle force on the teeth to move them into alignment. Invisalign does not use any rubber bands, wires, or brackets, which can cause irritation to the gums and cheeks.

One of the benefits of invisalign is that it works faster than traditional braces. It usually takes about half the time to achieve a full smile with invisalign than with conventional braces. The length of treatment will depend on the severity of the case, and a dentist will be able to give a patient an idea of how long the process will take during a consultation and examination.

Despite the advantages of Invisalign, it is not the right solution for everyone. For example, it is not ideal for people with a history of periodontal disease. Moreover, some patients might have difficulty remembering to wear the trays. In these cases, traditional braces might be a better choice.

If you’re considering Invisalign, talk to a world-class doctor in Phoenix. At Dickerson Orthodontics, we offer a free initial consultation that includes an exam and photos. A qualified orthodontist will help you understand the difference between Invisalign and traditional braces, so you can make an informed decision about which treatment is best for you.

It’s more affordable

For those that are considering undergoing orthodontic treatment, cost is often a major factor. Fortunately, there are many options available to help make Invisalign more affordable. For instance, patients with dental insurance may be able to receive significant discounts on their Invisalign treatment. In addition, certain orthodontists offer special discounts throughout the year.

The initial cost of Invisalign is usually much lower than traditional braces. The difference in price is due to the fact that Invisalign is a more efficient way to straighten teeth. The process is much shorter than traditional braces and requires fewer office visits. Furthermore, there are no restrictions to your daily routine with Invisalign trays as you can remove them to eat and brush your teeth.

Another advantage of Invisalign is that it’s less visible. This means that it’s more discreet than braces and will not make you feel self-conscious about your smile. Furthermore, patients can use their preferred whitening product while wearing Invisalign, which they cannot do with traditional braces. Invisalign is also more effective at treating mild to moderate misalignments than traditional braces. However, it is important to note that some cases require a more extensive treatment. For example, severe crowding or bite problems may require more than just aligners to correct them.

Ultimately, it is important to find an orthodontist that has experience with Invisalign. The amount of experience an orthodontist has with Invisalign will be reflected in the prices they charge. Patients can check their orthodontist’s level of expertise by looking at their Invisalign tier status on their website. This will indicate how many patients the orthodontist has treated with Invisalign.

While Invisalign is an excellent option for many patients, it is not always suitable for everyone. It is important to consult a dentist or orthodontist to see whether it is right for you. Invisalign can be used on adults, teenagers, and children, but the results may not be as dramatic for older adults. This is because the bone density in older adults decreases, causing slower tooth movement. Therefore, if you are older and have more advanced issues with your teeth, you might be better off with traditional braces.

It’s more effective

Unlike braces, which consist of metal wires and brackets, Invisalign uses clear plastic aligners to straighten your teeth. Your doctor will scan your mouth, then use a computer program to create a series of custom aligners designed specifically for you. Invisalign can correct a wide range of issues, including tooth crowding, overbite, underbite, and gaps.

The aligners are made from SmartTrack, a thermoplastic material that ensures they are easy to remove and put back in. They are also transparent, so you can see how your smile is changing throughout the treatment. You’ll need to wear the aligners for 20-22 hours a day, but you can take them out to eat, drink, brush your teeth, and participate in sports or other activities. You may experience some discomfort during the first few weeks of wearing your aligners, but this should go away within a few days.

You’ll need to clean your aligners regularly. If you don’t, they can become odorous due to bacteria buildup. You should clean them in the morning and at night before you put them back in your mouth, and they should be rinsed after every meal. You should also soak your aligners in a dental cleaner every day to prevent them from becoming discolored.

Another benefit of Invisalign is that it offers your dentist more control over your teeth than braces do. This is because the aligners shift each tooth individually, rather than a group of them simultaneously, as is the case with braces. This allows your orthodontist to be more precise in the way they move your teeth and can help reduce the time it takes to finish your treatment.

If you don’t follow your doctor’s instructions, your Invisalign treatment may not work as well as it should. One major reason for this is that you won’t be wearing your aligners as long as you should, which can lead to less dramatic results. Another is that you may not be as disciplined about putting them back in after eating or brushing, which can make your treatment take longer. But if you’re committed to getting the most out of your Invisalign treatment, you can achieve a beautiful, straight smile!

Types of Roofing

A roof is the main barrier between a building and the weather. Today, homeowners have a wide selection of options for protecting their homes.

A residential roofing system has five components: roof decking (also known as sheathing), underlayment, roof flashings, ventilation products, and shingles. Click the Denver Roofing Companies to learn more.

Wood is one of the oldest roofing materials, and it remains a popular choice for some upscale homes where a rustic style is desired. While cedar is the most commonly used type of wood for roofing, there are many other options, including pine and cypress. Cedar is a great choice for roofing in atmospheres that experience blistering summers and harsh winters, as it is an excellent insulator and keeps moisture from seeping into the home. It can withstand a wide range of climate conditions and is naturally resistant to mold and fungus.

Wood shakes and shingles can have a more rustic look than other roofing materials because they are hand-split. They offer a distinct appearance that distinguishes homes from the surrounding neighborhoods. They are a great option for homeowners who don’t mind a faded look, as they will become more endearing with time. They are also an eco-friendly roofing choice, as long as the wood is harvested ethically and is treated with fire-retardant chemicals.

While they look appealing, wood shakes are more vulnerable to damage than other roofing materials. When wet, they can swell and rot, warp, and crack. They can also harbor mold and fungus and tend to discolor over time.

Other roofing material choices may be more suited to your climate as they don’t require the same level of maintenance. However, if you are still looking for a more rustic appearance, there are alternatives that offer a similar appearance to wood shakes. These include cypress and yellow pine, which are also a budget-friendly choice and can be upgraded with fire retardant treatments.

If you are interested in a wooden roof, be sure to discuss the best choice with a professional roofing contractor. They can help you choose a roof that will best suit your needs and budget. They can also give you a quote for the project and will provide you with a list of required materials. They will also help you select the appropriate type of wood for your roof, as different types of wood will be better suited to different weather conditions.

Metal

Metal roofs are popular for commercial and industrial buildings, but they are gaining popularity as a roofing option for homes as well. This type of roofing starts out as a coil or sheet of metal and can be formed into different shapes, sizes, and lengths to fit the needs of each individual building. This versatility, along with the durability and variety of colors available, make this a great choice for homeowners who want a more modern look than traditional asphalt shingles.

PRO: This is a fire resistant material and will withstand high winds and large hail better than asphalt shingles. It is also durable and will last for years with very little maintenance needed. Additionally, it reflects the sun’s rays and helps keep your house cooler, which can help lower your energy costs. CON: Like any other roofing material, it can rust, especially in wet climates or if not properly maintained. It can also be expensive to install and maintain a metal roof.

Another drawback to this roofing is that it can be noisy in rain or hail storms. Also, some people are concerned about the weight of a metal roof and how much it will affect the structure of their home.

This is a common roofing material used for barns and agricultural structures, but it is becoming more common on residential homes because of its durability and versatility. It is typically installed using exposed fastener panels, which are overlapping and attached to the roof deck or framing through the face of the panel with either sealant or exposed fasteners. These exposed fasteners can be unsightly, but they are often painted the same color as the roofing panel to help conceal them.

Because of the way these panels are installed they must be allowed to expand and contract with the weather. This can cause gaps to form between the panels if they are not properly fastened or sealed, which can lead to leaks and water damage in the structure of your home.

The cost of a metal roof is high, but it can provide a long-term benefit for the homeowner. While a metal roof may not be ideal for every homeowner, it is a great alternative to an asphalt shingle roof and is very energy efficient.

Asphalt

Roofing is an important part of a building’s overall protection. There are many different roofing options available, each with its own pros and cons. However, asphalt shingles remain one of the most popular and enduring choices for residential roofs. The history of these shingles tells a story of long-term development and adaptation, responding to changing construction practices and environmental challenges.

The early American roofing industry began with a basic method of covering roofs with heavy paper covered with pine tar and sprinkled with sand to provide grip and texture. This system continued until around the 1800s when two Ohio businessmen, Samuel M. and Cyrus Warren, started using coal tar instead of pine tar for their roofing systems. Coal tar was cheaper, and the developing chemical industry improved its quality from a useless byproduct to something more useful for roofing systems. By the 1860s, the growth of the petroleum industry provided an even more abundant source of roofing asphalt, making it possible to replace pine tar with it.

Today, roofing asphalt is made of a blend of various ingredients. The most important one is oxidized asphalt, which is the main water-resistant component of the shingle. It is blown through hot air to increase its viscosity and improve its ability to resist weathering. In addition to oxidized asphalt, roofing asphalt may also contain a fine mineral powder that increases its durability.

These components are combined in a proprietary recipe that is carefully tested and calibrated to perform at the highest levels for shingle production. Once the mixture is ready to go, it is rolled onto the surface of a roof by a machine called a mop or broom. The mop or broom helps to distribute the asphalt and ensure it adheres properly to a roof deck. It also removes any excess materials, which can reduce the lifespan of the shingles.

The asphalt in roofing shingles is available in a wide variety of colors, which makes it possible for homeowners to preserve or enhance their home’s aesthetic while protecting the building’s structural integrity. It is also available in two types: regular (3-tab) shingles and dimensional shingles. Both types feature an array of color options, which means that every homeowner can find a shingle to suit their own personal taste and complement the look of their home’s exterior.

Pine

Pine is a softwood that is used for many building projects. It has the strength to be used for residential framing but is also cost-effective and easy to work with, making it a popular choice among builders and do-it-yourselfers. It is also a good option for porches, decks and flooring where high-traffic areas are expected. Pine is resistant against wear, meaning that it won’t need replacing as often as some other types of wood.

The softness of pine makes it less durable than oak, and it is therefore more prone to scratches and dents. It is also more susceptible to moisture, which can lead to the formation of moss and other fungi on your roof. This can also damage shingles and the structural integrity of your home.

As pine trees are evergreen, needles from pines can fall on your roof throughout the year, especially in bad weather. They tend to form large clumps, which are what people refer to when they talk about “pine straw.” These mats can be difficult to dislodge and can cause shingle damage as they break down. They also trap moisture and inhibit proper ventilation, which can encourage the growth of moss and mold. Additionally, the clumps of pine needles can block your gutters and cause them to clog.

Thankfully, there are ways to prevent pine needles from damaging your roofing. For one, you can install a gutter system that will prevent pine needles from entering your gutters. Another way is to use a water-resistant sealant on your roof, which will help to protect it from moisture and UV damage. It is important to remember, however, that these sealants do not last forever, and you will need to re-apply them regularly in order to keep your roof protected from the elements.

Another alternative to using pine shingles is to use a product such as cypress. Cypress is a resilient hardwood that is commonly found in the southeast and has a high resistance to moisture, which can be beneficial for your roof. It is also resistant to insect damage and rot, making it an excellent choice for your roof.

Shower Doors – Framed Or Frameless?

Shower Doors are available in several types and styles to suit a wide range of homeowner preferences and requirements. Some of the most popular shower door options are:

Shower Doors

Clear glass is a popular choice because it allows natural light into the shower and matches any bathroom color palette. Etched and patterned textures obscure the view for privacy. Tempered glass is tough and can withstand daily wear and tear. When it does break, it crumbles into small pieces instead of sharp shards.

The bathroom is one of the most popular areas for homeowners to focus their remodeling budgets. It’s a space that we use every day and it can really help to make your home more welcoming, attractive and functional. There are a lot of different ways you can update this room and one popular choice is to install new shower doors. But which ones do you choose – framed or frameless?

Frameless shower doors are a more modern option that offer a sleeker look. They’re often made of tempered glass and come in a variety of thicknesses and colors to suit any décor. They’re more expensive than framed shower doors though and require specialized hinges that are usually custom-made for each installation.

Since they don’t have any metal frames, these doors are less likely to corrode over time. They’re also easier to clean as there are no nooks and crannies for dirt and mildew to collect. However, they can be more difficult to keep completely water-tight.

A framed door is more likely to have a track at the bottom that can collect mineral deposits and contribute to corrosion over time. This can also create an environment that’s perfect for the growth of mold and mildew. Framed doors are also less likely to be treated with Diamon Fusion, which helps prevent the buildup of soap scum and water spots on the glass.

Although it’s rare, frameless doors have been known to shatter. This is usually due to damage or defects in the glass, improper installation or severe or abrupt changes in temperature or humidity. The good news is that tempered glass is designed to break into thousands of tiny pebbles, which reduces the risk of injury from jagged shards.

If you choose to go with a frameless shower, it’s important to work with a professional company that specializes in this type of installation. They’ll be able to offer you a wide selection of glass options and will know how to properly install them so that they can last for decades.

While frameless showers are more beautiful and easier to clean, they’re also a little more dangerous than framed showers. If the glass does break, it can cause serious injury if it falls on you. To minimize the risk, be sure to check your doors regularly for signs of wear and tear and never slam or swing them shut. You should also be careful not to place any sharp objects near the glass or use them to support yourself while showering. By following these simple tips, you can help to ensure that your frameless glass shower doors stay safe and beautiful for years to come.

Framed

If you’re on a budget or want a more traditional look, framed doors might be the best fit. They are less expensive than frameless and can still be customized to your shower, although they tend to have a shorter lifespan than their more contemporary counterparts. Framed doors have metal framing around their edges, panels, tops and corners that are generally made of aluminum. The metal framing helps keep water from seeping under the door or onto the bathroom floor, but it can also create a heavier barrier that can cause more frequent and more severe leaks than a completely glass enclosure.

They are also more prone to corrosion from the constant exposure to moisture and can have a harder time keeping clean than their frameless counterparts. The metal frames can collect mineral deposits, leading to the growth of mold and mildew, and are more likely to require squeegeeing after each use. Additionally, they only open outward and can be a hazard for children or people with limited mobility.

Despite their drawbacks, framed shower doors offer some advantages that should be considered as well. Since framed showers typically have thicker panes of glass, they can provide a more spacious feeling in the bathroom. Additionally, framed showers can be customized to your specific dimensions and are available in a variety of configurations including sliding, bi-fold, neo-angle, or hinged doors.

While they are a more durable and affordable option, the metal framing on framed shower doors can become more prone to leaks over time, especially in older homes or with poor installation. Additionally, the caulking used to create the water-tight seal may fail, and the weight of the metal framing can make framed showers more prone to leaking at the joints and in the corners.

A popular alternative to framed shower doors is the semi-frameless style. This type of shower offers the benefits of a framed shower with a cleaner, more minimalist design. They are typically a little more expensive than framed doors, but they are still considerably less costly than fully frameless showers and can be custom fitted to your opening. Like framed showers, semi-frameless options are available in a wide range of styles and can be configured with sliding, pivot or hinged doors.

How to Do Your Own Faucet Repair

Remove the decorative cap on each handle using your chosen screwdriver. Place the parts in order as they are removed to make reassembling the faucet easier.

Faucet Repair

Plug the drain and turn off the water supply valve to the dripping faucet. Remove the escutcheon cap by lifting it and unscrewing it. Soak the disk cylinder in calcium remover or white vinegar. Visit https://www.plumbing-express.com/ to learn more.

Dripping faucets are an annoyance that can add up over time, and one that often results from the O-ring or washers inside the assembly wearing out. These can be replaced easily, but it’s important to shut off the water supply before you start working — not only to prevent flooding but also to ensure that the faucet is completely dry when you reassemble it.

Look for the fixture shutoff valves under your sink and turn them off. If your house is on a well, you’ll have to disconnect the water from the main line to turn off your sink. If you’re unsure of how to do this, contact a professional plumber.

Before you proceed with a faucet repair, make sure you have all of the tools needed to take off your handle and disassemble the rest of the faucet. This includes a flathead screwdriver and possibly a hex wrench or allen wrench depending on your faucet’s setup. If the screws are corroded or seized, you may need penetrating oil to loosen them. Once the water is off, plug your sink drain to ensure you don’t lose any small parts as you work.

Next, you’ll need to figure out which of the two valves under your sink is leaking. To do this, turn off the cold-water valve first and see if the leak stops; if not, then you need to shut off the hot-water valve. After this, you can use a screwdriver to remove the decorative cap on your faucet handle and expose the top-mounted handle screw. Be careful not to drop any small pieces as you do this, and place the parts aside in the order they were removed so they’re easy to reassemble.

Remove the Handle

Most faucets have a decorative cap on the end of the handle. Try to pry this off with a screwdriver, if possible. It may be stuck due to mineral buildup or corrosion. If it won’t budge, apply some penetrating oil to the area and give it a little time to work. Gently tapping it with a rubber mallet may also help to loosen the handle.

After the handle is free, you should be able to see the stem and the adjusting ring that holds it in place. You can replace this part if it’s worn, especially if the handle is leaking at the base. It’s a good idea to replace the O-ring while you’re at it, too.

Depending on the type of faucet, you may need to remove other parts before you can take off the handle. For example, cartridge and ceramic-disk faucets require removing the escutcheon caps (also called bonnets) to expose the cartridge or disk cylinder. For compression faucets, you may need to remove the valve stem or a washer.

If the faucet has a set screw on the side of the handle base, you can remove it by unscrewing it with a wrench or hex key. If the faucet doesn’t have a set screw, there is no need to remove the handle. Just make sure to turn the water supply off before attempting any repairs. You’ll want to plug the sink drain as well, so you don’t lose small pieces down the drain. When you’re done, put the handles back on, turn on the water, and test for leaks. Then, if necessary, you can begin working on the plumbing repairs. If you’re having trouble finding replacement parts for your faucet, try a local home improvement center or a plumbing supply specialist.

Disassemble the Faucet

Depending on your faucet model, there may be additional components to remove. You will need to examine each one, as some may be worn or damaged and may need to be replaced. Use a mild detergent or vinegar solution to clean the faucet parts, including the cartridge, washers, O-rings, and seals. This will help to remove any build-up of minerals and residue that could affect the faucet’s performance.

If your faucet has a decorative cap, pry it off to expose the handle screw. This may be an Allen screw, a Philips screw, or a set screw that needs to be removed with a handle puller. Once the screw or set screw has been removed, lift the handle off the faucet. If your faucet has a dome assembly under the handle, you will need to unscrew it with large slip-joint pliers. Once you have removed the dome, you will be able to remove the metal handle adapter and the plastic pivot stop. At this point, you can either insert a new cartridge or replace the old one. If you are replacing the cartridge, it’s a good idea to remove the brass retainer clip first, as this will make it easier to install the new cartridge.

With the handles and escutcheon out of the way, you should be able to see the mounting nuts that hold the faucet body in place. Loosen these with an adjustable wrench or a pair of channel-type pliers. Once the nuts are removed, the faucet body should usually fall out of the sink, but be careful not to drop it on the floor or cabinet underneath. Before you reassemble the faucet, test it to ensure that the handle moves smoothly and that hot and cold water are properly mixed.

Inspect the Parts

Using a clean cloth soaked in water and white vinegar, gently wipe away any grime or mineral build-up on the parts of your faucet. This is especially important for older faucets, where a rough surface on the valve seat or cartridge can cause it not to fit properly and seal the way it should, which can lead to leaks.

After cleaning, you can see more clearly whether there are any cracks or other damage that would require replacing the part. This is also a good time to clean the aerator, which mixes air and water so that you get a smooth flow from your faucet. This can help you save on your utility bills by reducing the amount of water you use.

If your faucet is leaking around the handle, it’s likely a problem with the spindle or “packing.” The spindle is the metal tube that extends down into the spout. Older faucets had packing, which was a string-like material that wrapped around the spindle inside the “packing nut.” Newer faucets have O-rings, which are easier to replace and last for years. It’s worth spending a little extra money on a high-quality replacement to avoid future problems with your faucet.

If you have a ceramic disk faucet, you might have a metal escutcheon cap directly under the handle that’s screwed on. Remove this with a wrench or screwdriver, then you should be able to unscrew the handle itself and the screw that holds it on. You may need to loosen this screw with penetrating oil first. Examine the screw and the washer, replacing them if they’re worn out or damaged. After this, you can reassemble your faucet and turn on the water supply to test it for any remaining leaks.

Replace the Parts

Once you’ve identified the faulty part, it’s easy enough to find replacement parts for most faucets. Some will need to be special order items, but others are available in ready-made kits at most hardware stores. Make sure to choose a kit that specifically mentions your specific faucet brand and model to be certain that the replacement part is an exact fit. Once the new part is installed, turn the water back on and check for leaks. If you don’t see any, your repair job was successful.

If a faucet is leaking around the handle, there may be an issue with the O-ring or the washers. These are thin disks of rubber or metal that act as a cushion and seal between various parts that come into contact with each other, such as the valve stem and the handle. Over time, these can wear out and cause leaks. If you suspect that the O-ring or the washers are causing your faucet to leak, replace them.

After you’ve removed the handles, take a look at the valve body to see what other replacement parts are required for your specific faucet. Some models have cartridges, while others have a cam and ball or a ceramic-disk cylinder. Each type requires different tools to remove the decorative caps and expose the corresponding parts.

If your faucet is a cartridge, remove the cap and collar with channel locks or a toothless wrench to get to the cartridge. Then, take out the cartridge and remove the retaining clip to pull out the valve seat. You can also sand the valve seat with emery cloth and then use a plumber’s tape to repair it. If the seals are leaking, you can replace them with fresh neoprene seals or use distilled white vinegar to clean out the cylinder openings and then replace the seals.