Pruning removes dead or unhealthy branches, reduces the risk of damage from heavy winds, and helps your trees look their best. Tree Pruning also promotes fruit production and improves the health of your trees and landscape.
Size management cuts shorten a tree’s height or width, typically to avoid interference with utility lines or to create clearance for buildings and vehicles.
Tree branches are the primary means through which trees manufacture (photosynthesis) and transport nutrients to other parts of the plant. They also form the skeletal structure of a tree and provide visual interest. Good pruning involves the removal of dead, diseased or structurally weak limbs while keeping branches evenly spaced throughout the canopy. Proper branch spacing promotes air movement, helps to prevent sun and wind damage and reduces the likelihood of limb failure during storms.
Branches that grow too close together can interfere with each other’s growth or crowd out desirable branches. They can also be a source of insect problems, such as sapsuckers that eat holes in the bark and wood or hummingbirds that hover near the ground seeking nectar. To maintain an attractive appearance, remove drooping or overhanging branches to create more open spaces in the canopy.
When trimming a branch, be sure to make your cuts correctly. A bad cut can lead to rot, insect infestation and other serious problems. Using a pair of hand shears or loppers, first saw an undercut about an inch away from where the branch intersects with the trunk. This will remove the majority of the weight of the branch while minimizing the size of the cutting wound.
Then, locate the “branch bark ridge” or branch collar — a slightly swollen area of tissue at the base of the branch where it joins the main stem. A proper pruning cut begins at the ridge, angles down and out away from the trunk and leaves a stub just outside of the collar. A flush cut (or a cut that is made all the way to the crotch) injures this tissue, making it more susceptible to fungi and other decay organisms.
Never seal pruning wounds with tree paint as this will only impede the natural process of compartmentalization that trees use to protect their internal tissues. In addition, pruning wounds on live wood are more likely to become a site for the spread of disease, such as oak wilt and other fungal mats, when they are exposed to sunlight.
Trunk
A tree’s trunk is its primary support structure. Branches grow from the trunk and extend upward into its canopy. Thinning a tree involves removing specific live branches to reduce the overall density of a canopy, allowing more sunlight through and improving air circulation. It also reduces stress on selected limbs from gravity, wind or snow.
Branches that are diseased, dead or damaged should be removed immediately. Pruning is more effective if it follows a definite plan, determining why you want to remove the branches and how much material you can safely take off in any one year. Hard pruning can encourage lots of vigorous upright shoot growth, called water sprouts, which are undesirable.
For thinning cuts, start by sawing an undercut through the base of the branch about 12 inches out from where you will be cutting. Then, saw a cut downward through the limb an inch or more farther out from the first undercut to prevent tearing the bark. This process allows the limb to break off between the two cuts, instead of falling away as a stub. It also ensures that the final cut is outside of the branch collar, which helps prevent water damage and slows decay.
Make all other pruning cuts using the three-cut pruning process, which will help prevent tearing the bark. Whenever you cut a branch larger than 1 1/2 inches in diameter, saw an undercut about an inch out from the branch collar (an area of stem tissue where a branch meets the trunk or an older branch). Then saw through the limb an inch or more further out than the first undercut until it breaks off. This will leave a clean, stub-free cut that won’t tear the bark. Always avoid removing the branch collar, which is important for wound closure and to protect against trunk disease.
Do not coat pruning cuts with tree wound dressing or paint. Studies have shown that these coatings don’t prevent or speed up wound closure and may actually slow down the natural healing process. They can also shelter disease organisms and encourage fungi that promote rot.
Canopy
The canopy of a tree is the top layer of branches and leaves that covers its stems. Canopy pruning aims to thin this dense layer and allows more sunlight to filter through below. This process helps promote plant health and prevents damage to other plants and property. It can also reduce the chance of limbs falling in high winds or during snowstorms.
It’s important to prune your trees regularly in order to keep them healthy and safe. You can remove dead or diseased branches, and eliminate branches that are obstructing sunlight or touching each other. This will help your landscape thrive by allowing it to get more light and air.
In addition, you can raise the canopy by removing lower branches that are growing too low and putting your property at risk of damage from storms or ice buildup. This will help keep your trees at the ideal height and provide a more manicured look.
When thinning or raising the canopy, be sure to use proper pruning techniques and follow the ANSI A300 pruning standards. The best time to perform these tasks is during dormancy, when the tree has a chance to heal before the next growing season begins.
Make all pruning cuts using reduction cuts only, and never heading cuts, which can weaken the tree and create problems later on. Also, be careful not to over-prune your canopy, which can leave the tree vulnerable to disease or insect infestation. If possible, only take off about 20% of your canopy during a single pruning season to avoid over-pruning.
Pruning Tools
Having the right pruning tools is essential for making clean, precise cuts to promote healthy plant growth and shape plants. Start by investing in quality cutting tools that will last for years and hold their edge after many uses and sharpenings. A well-made pruning tool will often have replacement parts and may even offer a lifetime warranty.
Hand pruners, also known as secateurs, are a common garden tool for pruning small branches and twigs. They have short handles and scissor-action blades, designed to make clean and precise cuts on shrubs, flowers, and vines. They come in three basic types: bypass, anvil, and ratchet pruners. Bypass pruners, which cut like scissors, are good all-rounders. Anvil pruners, which cut on a flat surface, can crush as well as cut, so are better suited to woody stems. For larger stems, a pruning saw is the best tool to use. Pruning saws usually have a fine-bladed saw for cutting green wood, and coarse-bladed saws for cutting dead wood. Some pruning saws are telescopic, allowing them to reach high branches without the need for a ladder.
A gardener should also consider using a loppers for trimming shrubs and hedges, or even a power hedgetrimmer for more extensive work and higher productivity. Some loppers have a shear-action blade that can be used for both fine and coarse cuts. These are good all-rounders, although they cannot cut as thick a branch as pruning shears. For heavy-duty trimming work, a telescopic pole saw can be used, which can be extended up to 3 m.
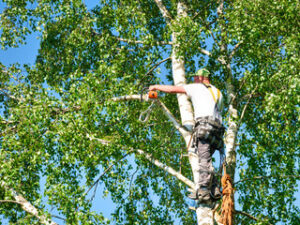
Safety is always a concern when working with tools. A pair of sturdy, close-toed gardening gloves can protect hands from thorns and other debris. A hard hat, eye protection, and hearing protection are also recommended when working with a chainsaw or other motorised equipment.
Finally, don’t forget to sanitize your pruning tools between each use. This reduces the chances of spreading disease from one plant to another. A rag soaked in rubbing alcohol can do the trick, or you can purchase a sanitizing solution from a home improvement store. It is also best to prune during the dormant season, as this will reduce the chance of spreading disease organisms.